Introduction
Since building a couple of Raspberry Pi-based music streamers, I’ve been on the hunt for the perfect music playback software package. I started out with the comprehensive Volumio program, but I found it struggled a bit with my large local digital music collection, and it appears to be transitioning to a subscription-based service for advanced features. Eventually, I ended up going in the opposite direction with the ultrasimple, appliance-like Ropieee Roon Endpoint software, which abandons any non-Roon-based local file playback but fits my primary needs pretty well. My priorities for music software for a Pi-based player are (in order of importance):
High-quality Roon playback for critical headphone listening. Spotify Connect for background stereo listening. Local file playback from Samba shared network directories. Support for the official Raspberry Pi screen. Attractive and user-friendly interface. Easy to set up and configure.
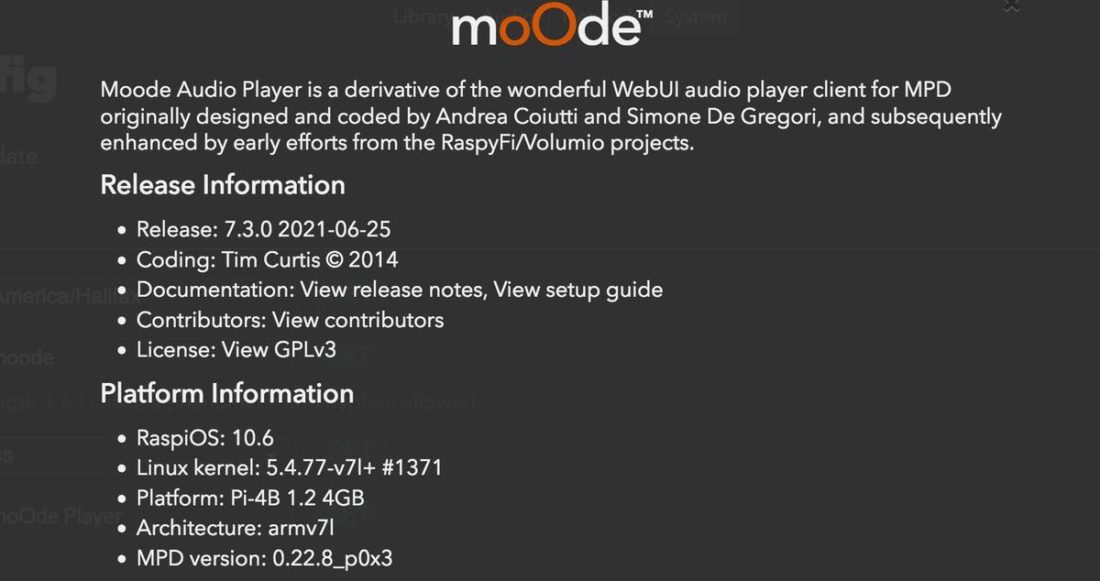
Another Pi-based, music software package that seems to get frequently mentioned online is moOde Audio, developed by Tim Curtis around 2014. moOde is a custom-built operating system based on Debian GNU/Linux. Version 7.3 is the most recent release at this point of writing. At first glance, its feature set looks similar to Volumio, but moOde is entirely free. That’s a win in my books, so I decided to give it a whirl. What follows are my experiences and observations, what I like and what I do not.
My Hardware Setup
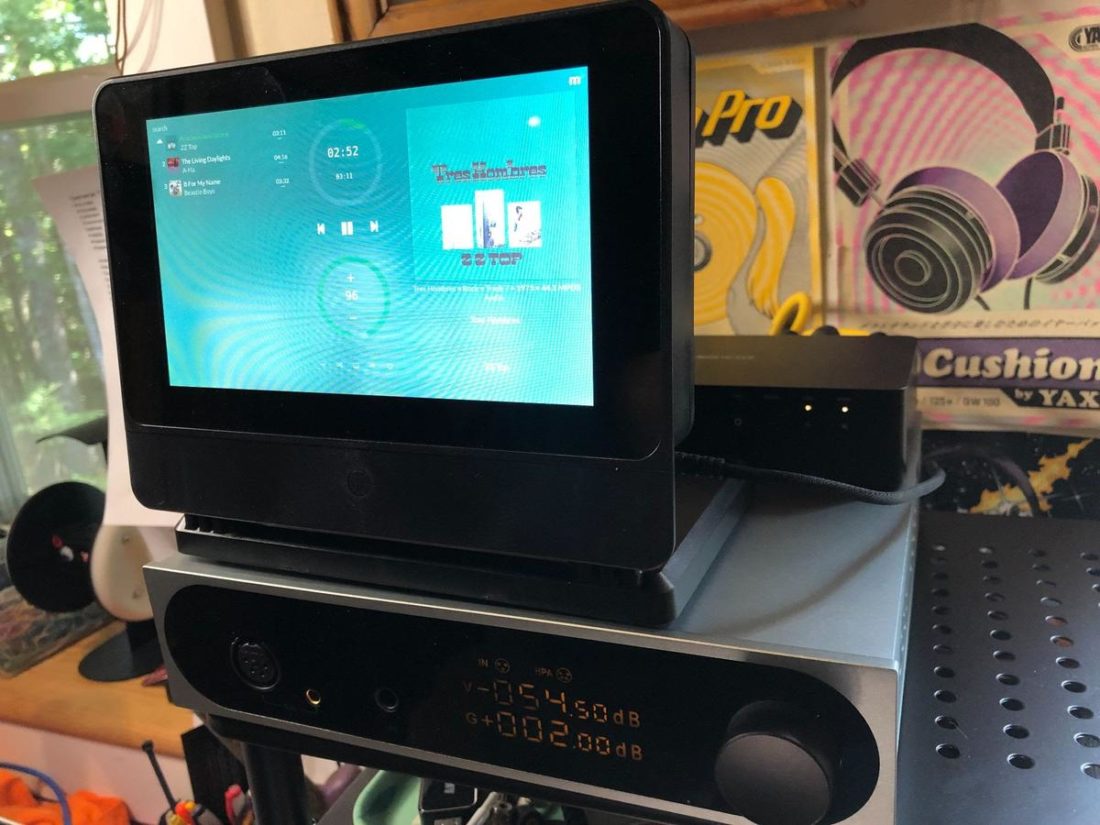
Raspberry Pi4 – 4Gb RAM Pi Screen – Official 7” Touch Display External USB DAC – SONCOZ LA-QXD1 Headphone amplifier – SONCOZ LGA1 Stereo speaker amplifier – The Fisher 400 Receiver
How to Install moOde Audio on Raspberry Pi
Regardless if you’ve ever installed software on a Raspberry Pi, the process is pretty straightforward. The basic installation of moOde Audio onto the SD card went flawlessly for me. I popped it in the Pi and the initial setup process went scrolling by on the screen. Of note, the default screen orientation was correct for my setup in a SmartiPi Touch Pro case (something that is not always the… err… case). However, it ended with a command prompt on the screen, and not the moOde visual interface I was hoping for. moOde, like many of the music playback software options for the Pi, is designed to be headless, that is, accessed via a web interface on a computer and not with an attached screen. So it shouldn’t be a surprise that the screen isn’t enabled by default.
How to Setup moOde Audio
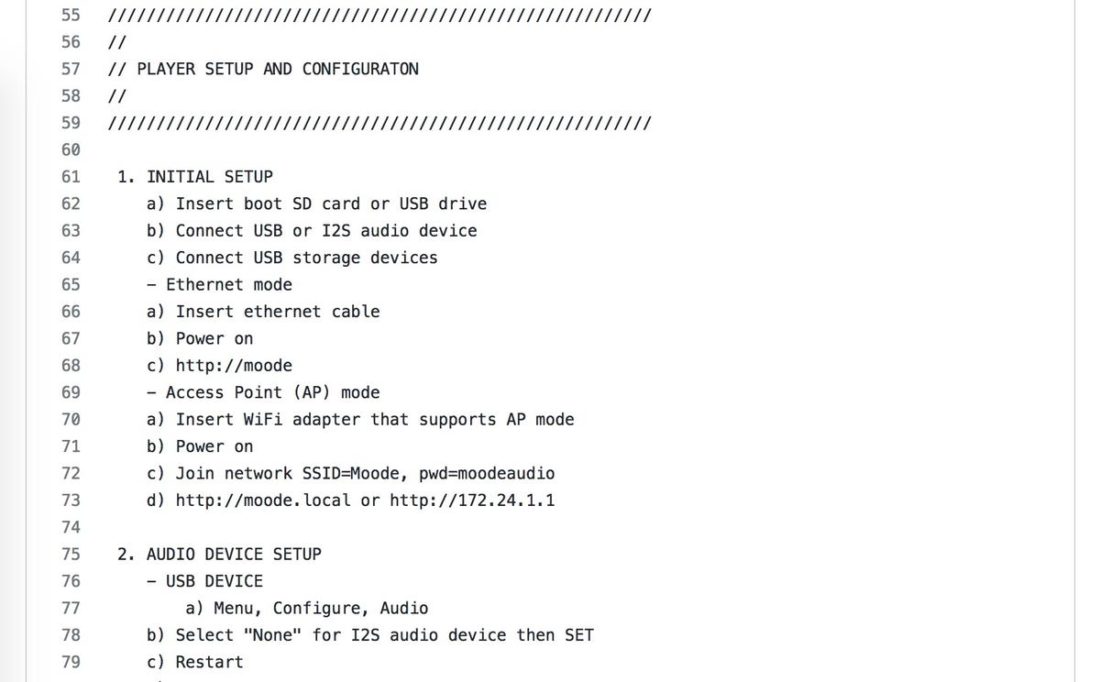
With a brief stop at the official moOde support forum, I quickly located the official Setup Guide. While comprehensive, it’s unfortunately just a simple text document, so the format may scare off some newbies who are expecting a visual guide with pictures. Without reproducing the entire setup process here, I’ll include a few notes that I discovered along the way that may be of use to you.
Pro Tips for moOde setup Enable the Raspberry Pi screen Enable a USB DAC Enable Spotify Connect Enable RoonBridge
Pro Tips for moOde setup
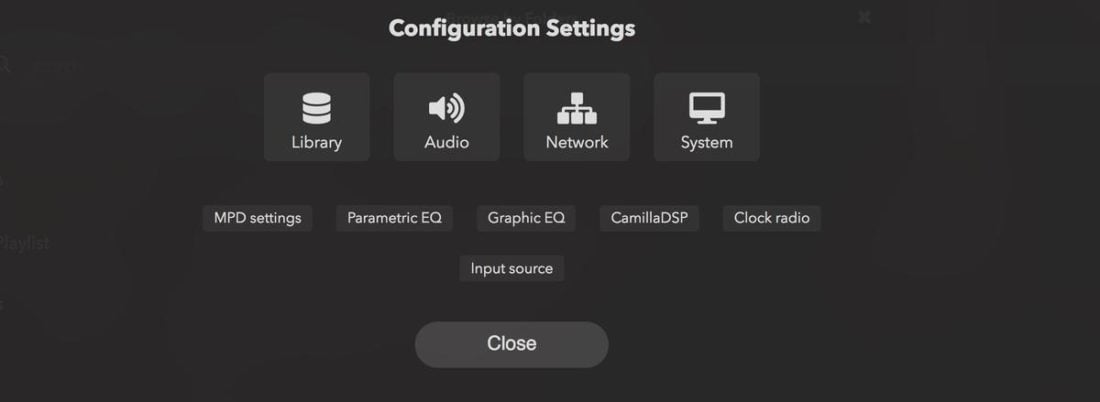
Attach a network cable before turning on the Pi and proceeding with the installation. This simplifies things and you will set up the WIFI connection shortly. Use a web browser on your computer to connect to the moOde interface at (http://moode.local or http://172.24.1.1). Once connected to the interface, click the small m icon in the top right corner to access the configuration settings. The Setup Guide walks you through setting up the audio device (USB or I2S DAC), Time Zone, Audio Source, and WIFI connection. I highly suggest leaving the Audio Source setup as the last thing you do, as depending on the size of your local collection, this can take hours to complete.
Enable the Raspberry Pi screen
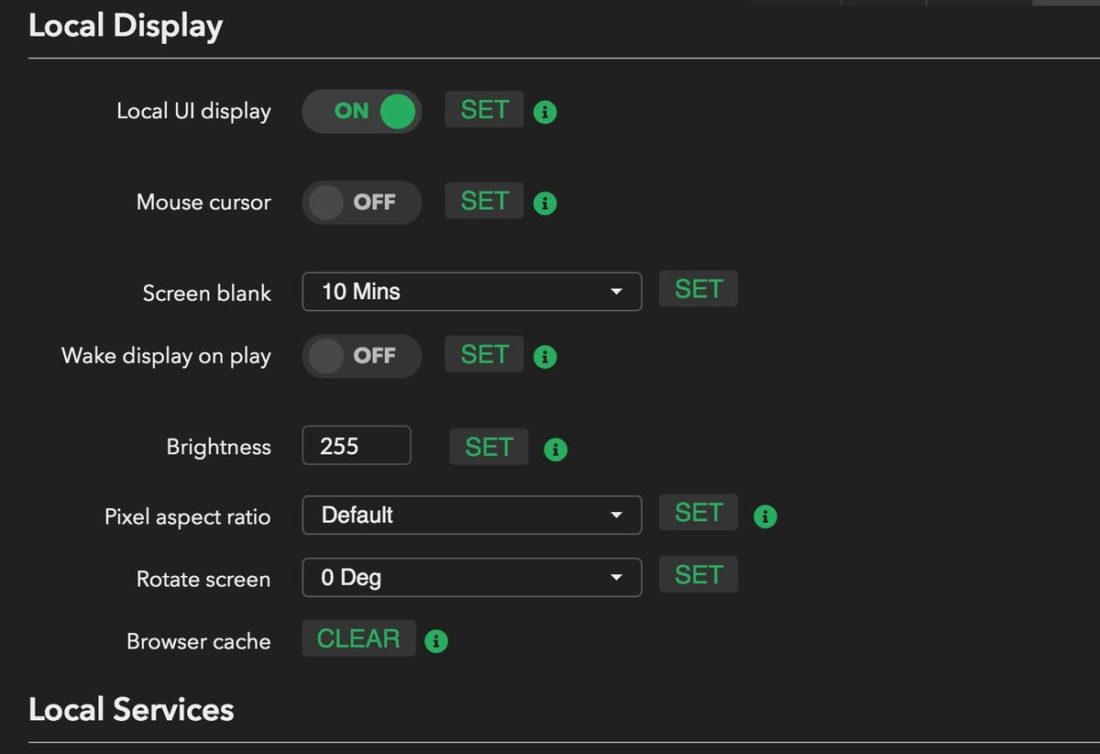
Enable the Pi screen: m → Configure → System → Local Display → Local UI Display → ON (Press SET to save the change)
Enable a USB DAC
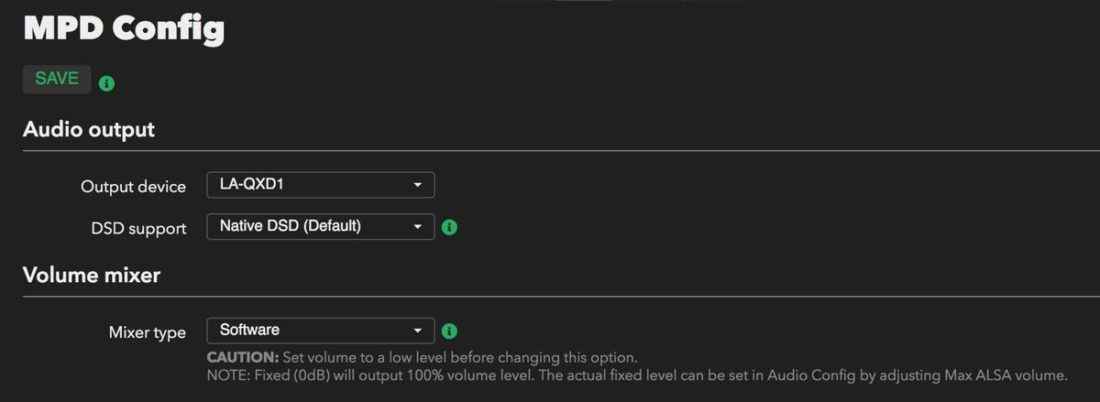
Enable a USB DAC: m → Configure → Audio → MPD Options → MPD Settings → Edit → Audio Output → Output Device → Change from the Pi Headphone Jack to the USB DAC. (moOde default is to output via the headphone jack)
Enable Spotify Connect
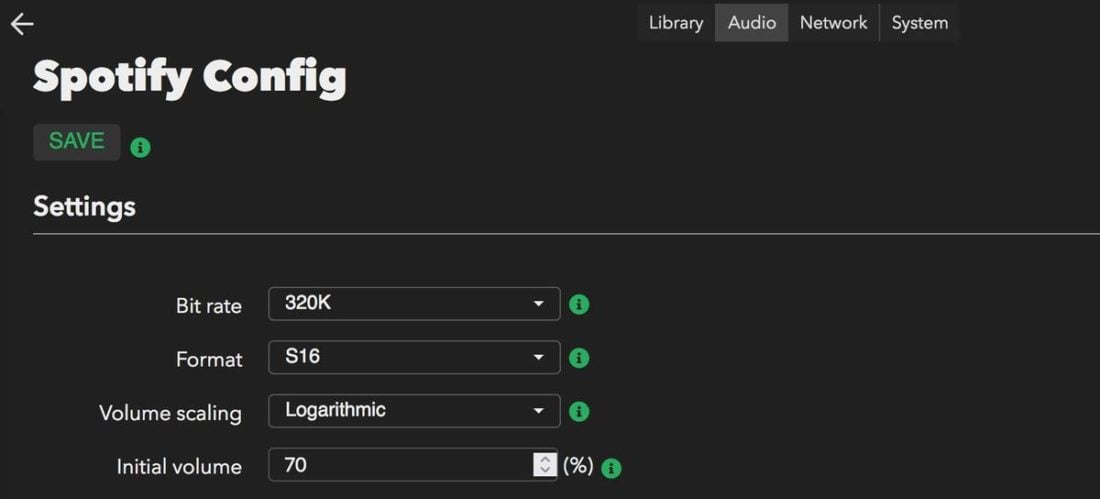
Enable Spotify Playback: m → Configure → Audio → Audio Renderers → Spotify renderer → Spotify → ON. (Press EDIT to change the Spotify config to increase the bit rate from the default 160 to 320kbps)
Unfortunately, after completing the above, Spotify appeared to work but no sound could be heard. This required me to dive back into the forum to discover that I was far from the only one having this issue with the 7.x versions of moOde and Spotify. Eventually, with a bit of trial and error, I kludged together a fix that seems to work, but does require you to do a bit more work. The first step is to turn on terminal access.
Enable terminal access: m → Configure → System → Local Service → SSH term server → ON.
Once terminal access is enabled, click the OPEN button under SSH term server. This launches the moOde login. Enter “pi” and then the password “moodeaudio” when prompted. At the [email protected]:~ $ prompt, enter the following: sudo sed -I ‘s/\ “hw/\”plughw/g’ /etc/alsa/conf.d/_audioout.conf
This sets the proper audio output for Spotify and sound will be passed through to the DAC. The fix seems relatively permanent as it still works after disconnecting power to the Pi and rebooting.
Enable RoonBridge
In order to access the RoonBridge Renderer settings under Configure → Audio, it is necessary to once again jump into the terminal as we did above for Spotify. The full instructions are located in the moOde forums. By completing all the above (which took me a few hours) I configured moOde to do essentially everything that I want it to do. There are a ton of options located in the Configuration settings, and I suggest you do your own trial-and-error to figure out what works best for you.
moOde Audio Features
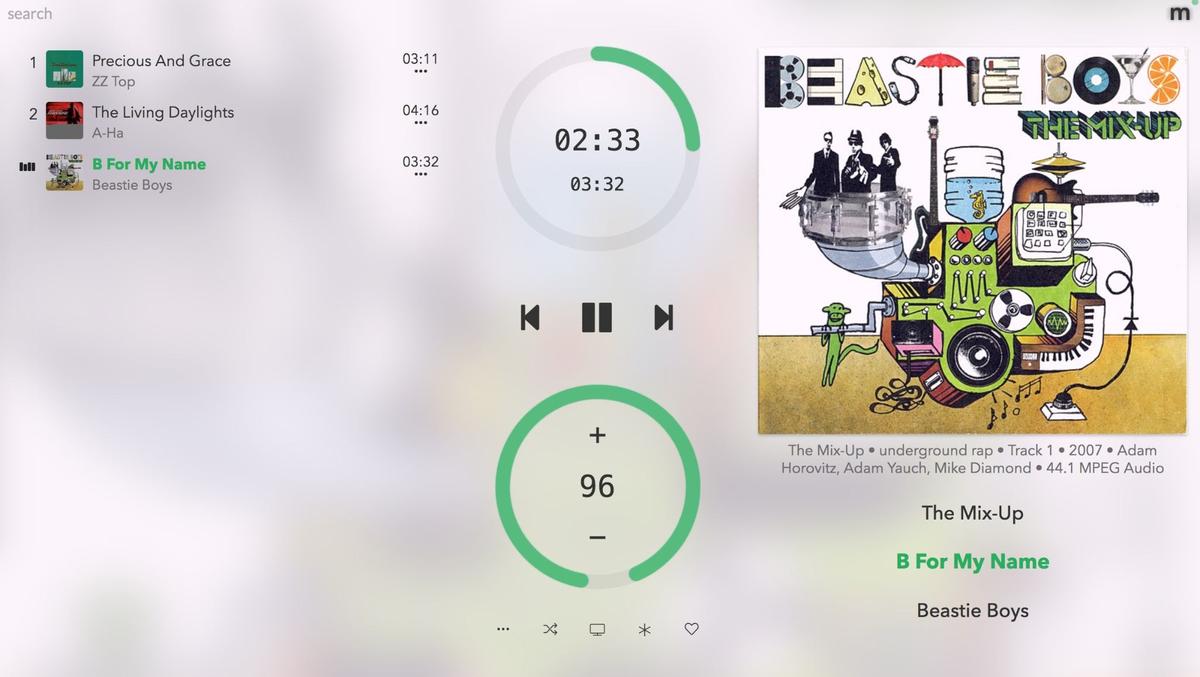
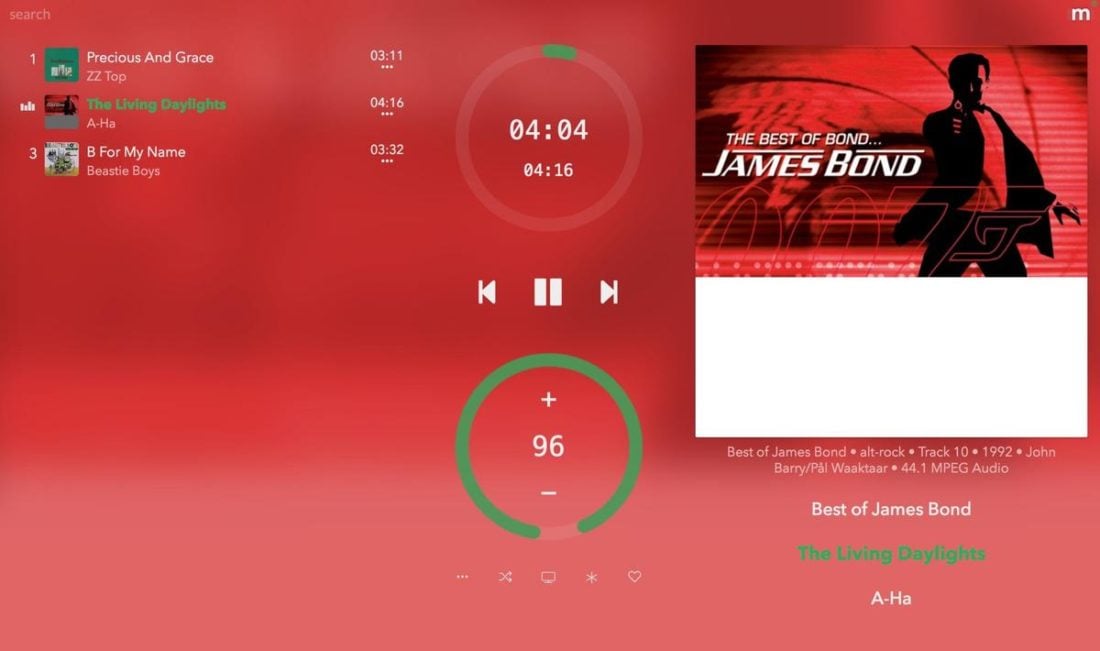
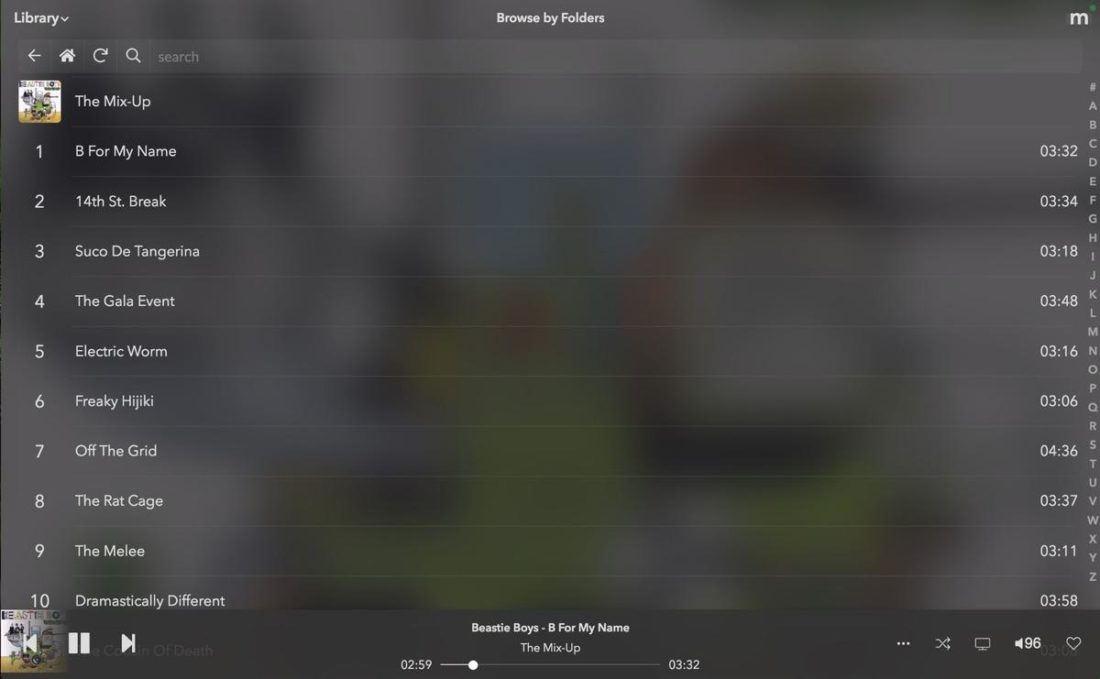
Once you’ve got moOde up and running, it’s time to check out all the features that it has to offer. The user interface is simple and relatively attractive. It’s broken into three main sections with the playlist on the left, volume and track completion represented as two circles in the middle, and album art and information on the right. I find the Volumio interface a bit prettier overall, but it is busier compared to the cleaner moOde design.
Additional moOde features
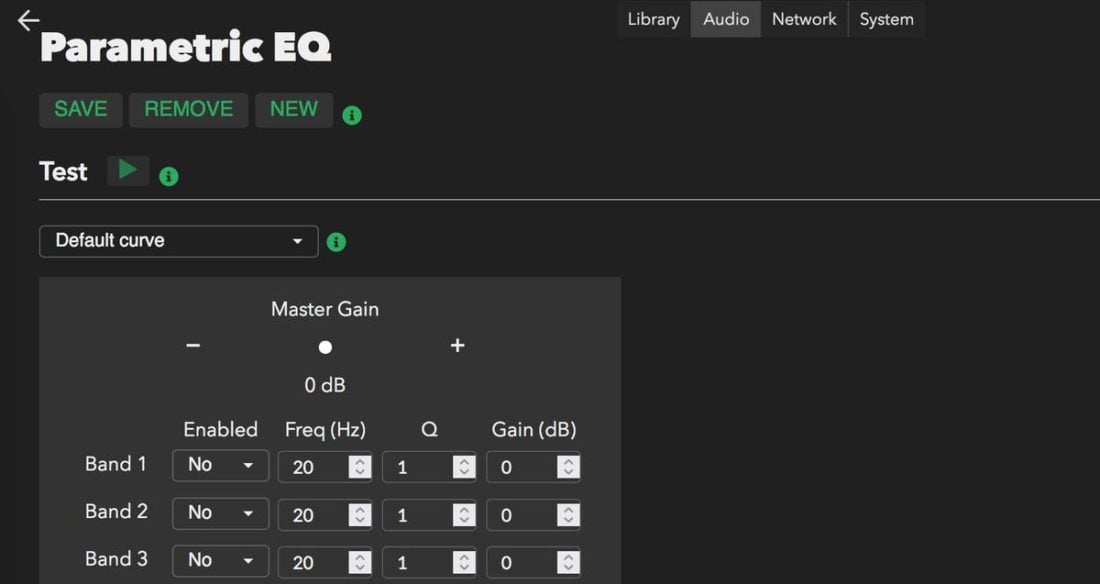
Radio, Folder, Tag, and Album views Advanced Library search/filtering engine Online radio station support with sort/group and metadata CamillaDSP and CamillaGUI Pipeline editor 12-band Parametric and 10-band Graphic EQ Crossfeed for Headphone listening CoverView full-screen UI for Album Art Bluetooth with w/SBC XQ CODEC Airplay, Spotify, Squeezelite, RoonBridge support Samba scan for easy NAS connection UPnP browser with folder scan Qobuz and Tidal access via UPnP WiFi Access Point (AP) Mode Touchscreen and HDMI display support USB keyboard and volume control support 64-bit driver support for Allo USBridge SIG DAC HAT In-place software updates
I2S DAC HAT audio device support
While USB audio devices are enabled by the standard Linux kernel USB audio driver, I2S audio devices are supported via specific drivers included by the device manufacturer. moOde Audio supports I2S DAC HATs from manufacturers including Allo, Denafrips, HiFiBerry, JustBoom, Lucid Labs, and many others. The full list is available here.
User Experience
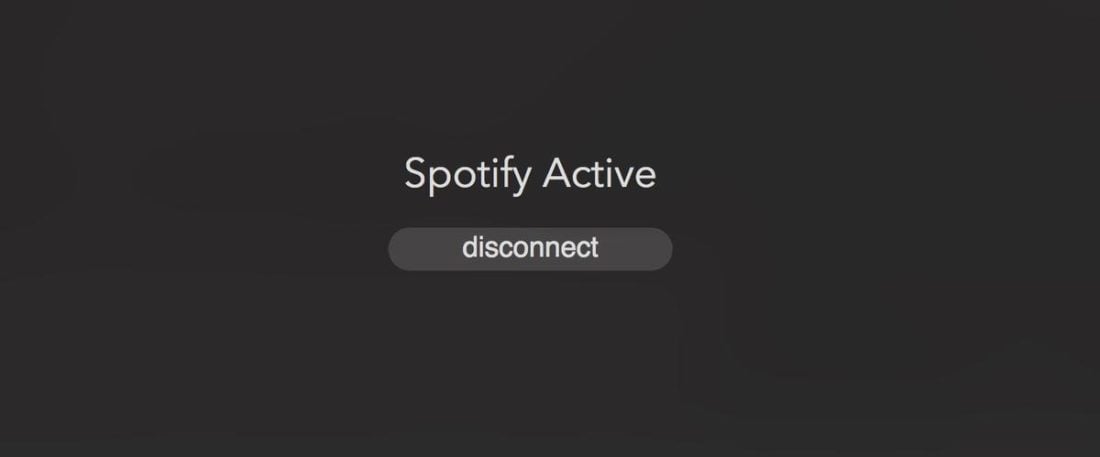
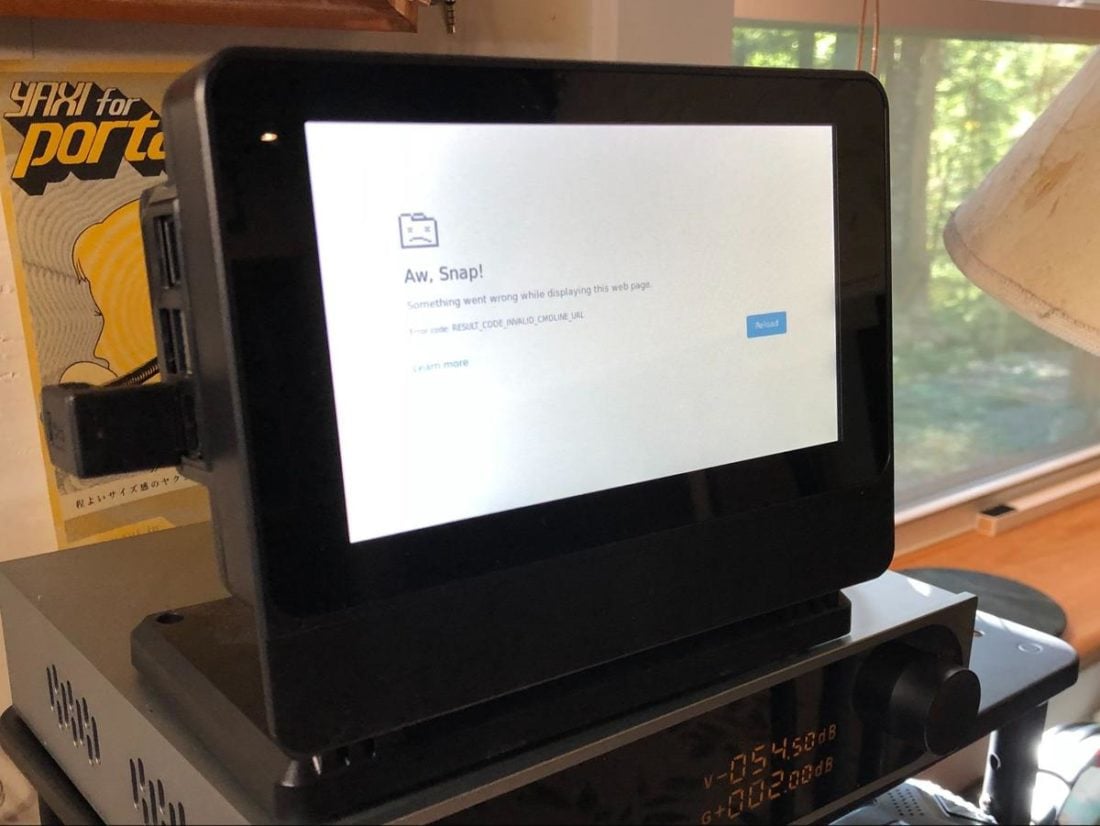
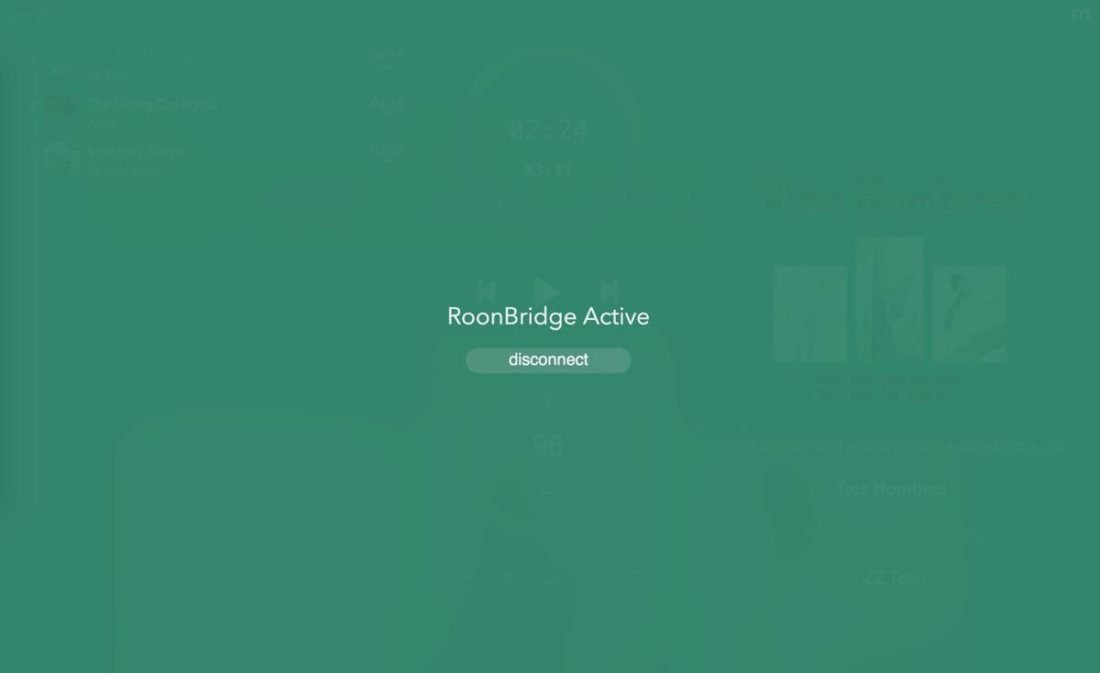
Once I hammered out how to get everything working, using moOde has proven to be relatively trouble-free. The only real bug that seems to crop up frequently is that the Pi display changes over to the default Chrome browser “Aw, Snap! Something went wrong while displaying this web page” error after a while. Clicking the Reload button refreshes the screen and brings back the moOde user interface, so it’s just moderately annoying rather than a deal-breaker. I haven’t yet discovered a fix, but with this sort of actively developing software, new versions full of bug fixes are already in the pipeline. I’m not entirely enamored with the plain screens displayed when using RoonBridge or Spotify Connect, which just show the active connection name and a “disconnect” button mid-screen. I prefer the album art and simple controls displayed by Ropieee when playing tracks from Roon – after all, that’s the point of having a screen on the Pi in the first place. So only seeing “RoonBridge Active” is a bit of a disappointment. No on-screen controls mean you are forced into using the Roon application on another device to control all aspects of playback. The same goes for Spotify. Of course, album art and onscreen controls display properly when using the built-in player, so this won’t be a problem for all users. Sound quality is really only limited by the quality of your DAC and other hardware components, and I’m happy to report that everything seems to work fine with moOde. It’s an audibly transparent user interface for the Pi that allows users to access their music in a variety of methods.
Conclusion
Now that I’ve spent time with moOde Audio, Volumio, and Ropieee, I can appreciate that they all offer different things to users with a variety of needs. moOde and Volumio are very similar programs, and although Volumio has a slightly prettier interface and more intuitive plugin support, its decision to paywall some features behind a subscription fee means that I have to give the nod to moOde. Ropieee is a different beast. It’s far more streamlined, with a focus on Roon playback and little else. However, it offers onscreen controls, cover art support, Spotify Connect, and a useful clock display when not active. This means that it fits my particular set of requirements almost perfectly. As always, YMMV. If you are currently a Volumio user or are new to the Raspberry Pi music player scene, you owe it to yourself to try moOde Audio out and see if it is a fit for you. moOde Audio development is far from static and is continually evolving and adding feature support. Version 7 is a polished and mature offering, and I look forward to checking out v8 whenever it appears.