Note: The Disabling process is similar in all devices using Windows 10 operating system – laptops, tablets, and desktops. However, you need to find out whether your system is configured with that way or not. Yes, you need to ensure that your device has 2-in-1 input method i.e. you can input through keyboard and mouse as well as through touchscreen. Thus, if you disable one of these methods, you can keep using your device without any trouble. Warning: Make sure that you don’t turn off or disable touch screen input method if it is the only input method available for your device. If you are using the tablet without keyword and mouse, only the touch screen is your option to manage your device. In this case, you cannot disable the touch screen option.
Why would you turn off the touch screen?
Indeed, touch screen input is very convenient for all of us. However, sometimes you find it more of a headache to manage your programs through the touch screen. Moreover, sometimes your children keep on playing with the system and touching the screen frequently causing trouble for you. At that moment, you can opt to disable touch screen in Windows 10. Don’t you feel sometimes that working on your systems through touch screen slows you down? Yes, most of the people do not find it easy to manage their system through the touch screen, therefore they don’t want to keep the already configured settings of the Windows 10.
Why would you turn off the touch screen? How to Disable Touch Screen in Windows 10 How To Enable Touch Screen In Windows 10
Another reason could be the malfunctioning of the touch screen functionality. It happens sometimes that it starts behaving as if you are touching the screen while you are not.
How to Disable Touch Screen in Windows 10
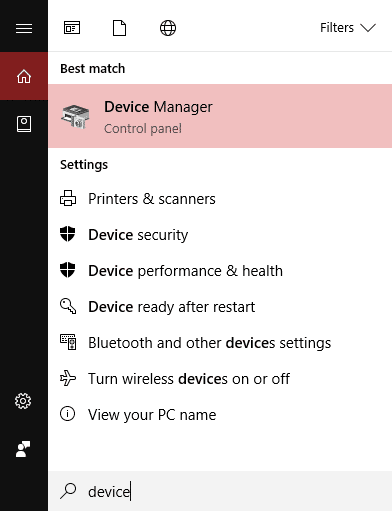
Note: Make sure to create a restore point just in case something goes wrong. By following the below-mentioned steps, you can easily disable this function: Step 1 – The first thing that you need to do is navigate to the “Device Manager” section. Type Device Manager in the Windows search box and open it. It is the place where Windows 10 keeps information about all your device connected with your system.
OR You can browse through the Control Panel to open “Device Manager”
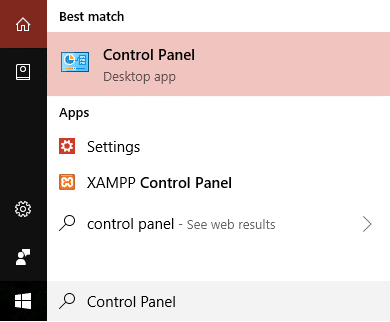
Open Control Panel on your system by typing “Control panel” on the Windows Search bar. Select Hardware and Sound option. Select the Device Manager option.
Step 2 – Here you will see the “Human Interface Devices” option, click on it and you will get a drop-down menu with all devices connected with your system.
Step 3 – Here you will find “HID-Compliant Touch Screen”. Right-click on it and select ‘Disable’ from the context menu.
OR You can select the “HID-Compliant Touch Screen” and click on the Action tab on the upper side of the tab and choose “Disable” option. You will get a confirmation pop-up where you need to select ‘Yes’.
That’s it, your device is not anymore supporting touchscreen functionality and you have successfully disable touch screen in Windows 10. In the same way you can turn on the functionality whenever you want.
How To Enable Touch Screen In Windows 10
All you need to do is follow the above-mentioned steps then right-click on HID-Compliant Touch Screen and choose the “Enable” option. It depends on your comfort and requirements. Whenever you want, you can Disable and Enable the Touch screen functionality of your desktop or laptop. However, it is always recommended to first identify your device and whether it is a 2-in-1 device or only has a single input method.
Recommended:
Easily Move Emails from one Gmail Account to another Airplane Mode not turning off in Windows 10 [SOLVED] Create Desktop Shortcut in Windows 10 (TUTORIAL) 4 Ways to Disable Automatic Updates on Windows 10
I hope the above steps were helpful and now you can easily Disable Touch Screen in Windows 10, but if you still have any questions regarding this tutorial then feel free to ask them in the comment’s section.


