RAM (Random Access Memory) is a computer storage devices which is frequently used to store the type of data that is being used by Operating System increase the general speed of a system. Once you shutdown your system all the data in the RAM is erased as it’s a temporary storage device and is used for faster access to data. Having more amount of RAM ensures that your system will run smoothly and will have a good performance as more RAM would be available to store more files for faster access. But having a good amount of RAM but not being able to use it is very annoying for anyone and that’s what the case here. You have programs and games that required a minimum amount of RAM to run but again you won’t be able to run these program as you have less available RAM (even though you have installed a large amount of memory). Why Windows 10 not using full RAM? In some cases some portion of RAM is a system reserved, also sometimes some amount of memory is also reserved by Graphic Card is you have an integrated one. But if you have a dedicated Graphic Card then this shouldn’t be a problem. Obviously, 2% of RAM is always free for example if you 4GB RAM installed then usable memory would be between 3.6GB or 3.8GB which is perfectly normal. The above case for users who have installed 8GB RAM but only 4GB or 6GB is available in Task Manager or System Properties. Also, in some cases, BIOS can reserve some amount of RAM making them unusable by Windows. Important Notice for users who have 32-bit Windows Installed For users who have 32 bit OS installed on their system, you will only be able to access 3.5 GB RAM no matter how much RAM you have Physically installed. In order to access full RAM, you need to clean install 64-bit version of Windows and there is not other way around this. Now before moving forward with the solutions for users who 64- bit version Windows and still not able to access full RAM, first check which type of operating system you have installed: 1.Press Windows Key + R then type “msinfo32” and hit Enter to open System Information. 2.Now in the new window that opens look for System Type in the right window pane.
3.If you have x64-based PC then it means you have a 64-bit operating system but if you have x86-based PC then you have a 32-bit OS. Now we know which type of OS you have let’s see how to fix this issue without wasting any time.
Fix Windows 10 not using full RAM
Also, make sure that the RAM is properly placed into its placeholder, sometimes silly things like this can also cause this issue, so before continuing make sure to swap the RAM slots in order to check for faulty RAM slots.
Fix Windows 10 not using full RAM Method 1: Enable Memory Remap Feature Method 2: Uncheck Maximum Memory Option Method 3: Update BIOS (Basic Input/Output System) Method 4: Run Windows Memory Diagnostic Method 5: Run Memtest86+
Method 1: Enable Memory Remap Feature
This feature is used to enable/disable memory remap feature which is mainly used for 64bit OS having 4GB RAM installed. Basically, it allows you to remap the overlapped PCI memory above the total physical memory. 1.Reboot your PC, when it turns on simultaneously press F2, DEL or F12 (depending on your manufacturer) to enter into BIOS setup.
2.Go to Advanced Chipset Features. 3.Then under North Bridge Configuration or Memory Feature, you find Memory Remap Feature. 4.Change the setting of Memory Remap Feature to enable.
5.Save and exit changes then restart your PC normally. Enabling Memory Remap Features seems to Fix Windows 10 not using full RAM problems but if this method doesn’t help you then continue to the next one.
Method 2: Uncheck Maximum Memory Option
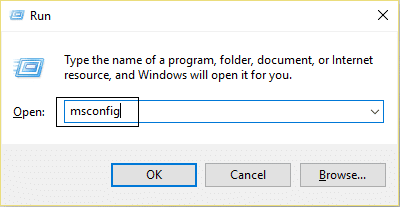
1.Press Windows Key + R then type msconfig and hit Enter to open System Configuration.
2.Switch to Boot tab then make sure you have highlighted the current installed OS.
3.Then click on Advanced options and uncheck Maximum Memory option then click OK.
4.Now click Apply followed by OK and close everything. Reboot your PC to save changes.
Method 3: Update BIOS (Basic Input/Output System)
Performing BIOS update is a critical task and if something goes wrong it can seriously damage your system, therefore, an expert supervision is recommended. 1.The first step is to identify your BIOS version, to do so press Windows Key + R then type “msinfo32” (without quotes) and hit enter to open System Information.
2.Once the System Information window opens locate BIOS Version/Date then note down the manufacturer and BIOS version.
3.Next, go to your manufacturer’s website for e.g in my case it’s Dell so I will go to Dell website and then I will enter my computer serial number or click on the auto detect option. 4.Now from the list of drivers shown I will click on BIOS and will download the recommended update. Note: Do not turn off your computer or disconnect from your power source while updating the BIOS or you may harm your computer. During the update, your computer will restart and you will briefly see a black screen. 5.Once the file is downloaded, just double click on the Exe file to run it. 6.Finally, you have updated your BIOS and this may also Fix Windows 10 not using full RAM.
Method 4: Run Windows Memory Diagnostic
1.Type memory in the Windows search bar and select “Windows Memory Diagnostic.“ 2.In the set of options displayed select “Restart now and check for problems.“
3.After which Windows will restart to check for possible RAM errors and will hopefully display the possible reasons as to why Windows 10 not using full RAM. 4.Reboot your PC to save changes.
Method 5: Run Memtest86+
Now run the Memtest86+ which is a 3rd party software but it eliminates all the possible exceptions of memory errors as it runs outside of the Windows environment. Note: Before starting, make sure you have access to another computer as you will need to download and burn the software to the disc or USB flash drive. It’s best to leave the computer overnight when running Memtest as it sure likely to takes some time. 1.Connect a USB flash drive to your system. 2.Download and install Windows Memtest86 Auto-installer for USB Key. 3.Right-click on the image file which you just downloaded and select “Extract here” option. 4.Once extracted, open the folder and run the Memtest86+ USB Installer. 5.Choose your plugged in USB drive to burn the MemTest86 software (This will format your USB drive).
6.Once the above process is finished, insert the USB to the PC in which Windows 10 not using full RAM. 7.Restart your PC and make sure that boot from the USB flash drive is selected. 8.Memtest86 will begin testing for memory corruption in your system.
9.If you have passed all the test then you can be sure that your memory is working correctly. 10.If some of the steps were unsuccessful then Memtest86 will find memory corruption which means Windows 10 is not being able to use full RAM because of bad/corrupt memory. 11.In order to Fix Windows 10 not using full RAM, you will need to replace your RAM if bad memory sectors are found. Recommended for you:
Fix REGISTRY_ERROR Blue Screen Errors How to Fix Windows 10 Won’t Remember Saved WiFi Password Fix Internet Explorer Has Stopped Working Because of iertutil.dll Fix WiFi keeps disconnecting issue on Windows 10
That’s it you have successfully Fix Windows 10 not using full RAM but if you still have any queries regarding this post feel free to ask them in the comment’s section.