How to Fix StartupCheckLibrary.dll Missing Error
The error message is quite self-explanatory and informs about StartupCheckLibrary.dll being missing. This file assists Windows in system startup and is responsible for running startup files. It is an official Microsoft system file and is found in C:\Windows\System32 directory along with other DLL files. Although, it has been heavily linked with computer trojans. The malware version of .dll file may find its way onto your computer system via pirated copies of programs and games.
How to Fix StartupCheckLibrary.dll Missing Error Method 1: Restore .dll file from Quarantined Threats Method 2: Perform SFC and DISM Scans Method 3: Delete StartUpCheckLibrary.dll file Method 4: Uninstall Windows Updates Method 5: Reinstall Windows
Antivirus programs are known to quarantine a dubious StartupCheckLibrary.dll file and thus, prompt this error. If certain Windows OS files or bugs in the recently installed version of Windows can also cause this issue.
How does one solve the problem of missing files? By simply finding the missing item.
Firstly, you will need to make sure that the antivirus program or Windows defender hasn’t falsely quarantined the StartupCheckLibrary.dll file. If it has, check the integrity of the file before releasing it from quarantine & restoring it Command-line tools such as SFC and DISM can be used to fix corrupt StartupCheckLibrary.dll file. Removing traces of dll file from Task Scheduler &Windows Registry can help get rid of the annoying pop-up. You can also manually download an official copy of the file and place it at its designated location. Alternately, revert to the Windows version that did not create the same issue.
The above points are explained below in a step-by-step manner.
Method 1: Restore .dll file from Quarantined Threats
As mentioned earlier, StartupCheckLibrary.dll can be infected by a virus and the antivirus program must have marked it as a threat & quarantined it. This would prevent the file from causing any further damage to your PC. If the StartupCheckLibrary.dll has indeed been quarantined, simply releasing it should do the trick. Although, before releasing, make sure that the .dll file is legitimate.
Press the Windows key, type Windows Security, and click on Open.
Click on Virus & threat protection option as shown.
Here, click on Protection history.
Open all Threat removed or restored entries and check if StartupCheckLibrary.dll is one of the affected items. If yes, check if the quarantined StartupCheckLibrary.dll file is a trojan or an official Microsoft file.
Press Windows + E keys together to open File Explorer and navigate to C:\Windows\System32 folder as shown.
Locate StartupCheckLibrary.dll file.
Upload the file on a virus-checker website such as VirusTotal, Hybrid Analysis, or Metadefender and verify its integrity.
If the file turns out to be legitimate, follow steps 1-4 to Threat removed or restored entries page.
Click on Actions > Restore to restore StartupCheckLibrary.dll file from Quarantine. Also Read: Fix VCRUNTIME140.dll is Missing from Windows 10
Method 2: Perform SFC and DISM Scans
You will be surprised to know how often system files on Windows are rendered corrupt or go missing altogether. This usually occurs due to the installation of bootlegged software but sometimes, a buggy Window update can also corrupt OS files. Fortunately, Windows 10 comes with a couple of built-in tools, namely, the System File Checker (SFC) and Deployment Image Servicing and Management (DISM) to repair corrupt system files and images. So, let’s use it to rectify this error.
Hit the Windows key, type Command Prompt and click on Run as administrator.
Click on Yes in the User Account Control prompt.
Type sfc /scannow and press Enter key to run System File Checker scan.
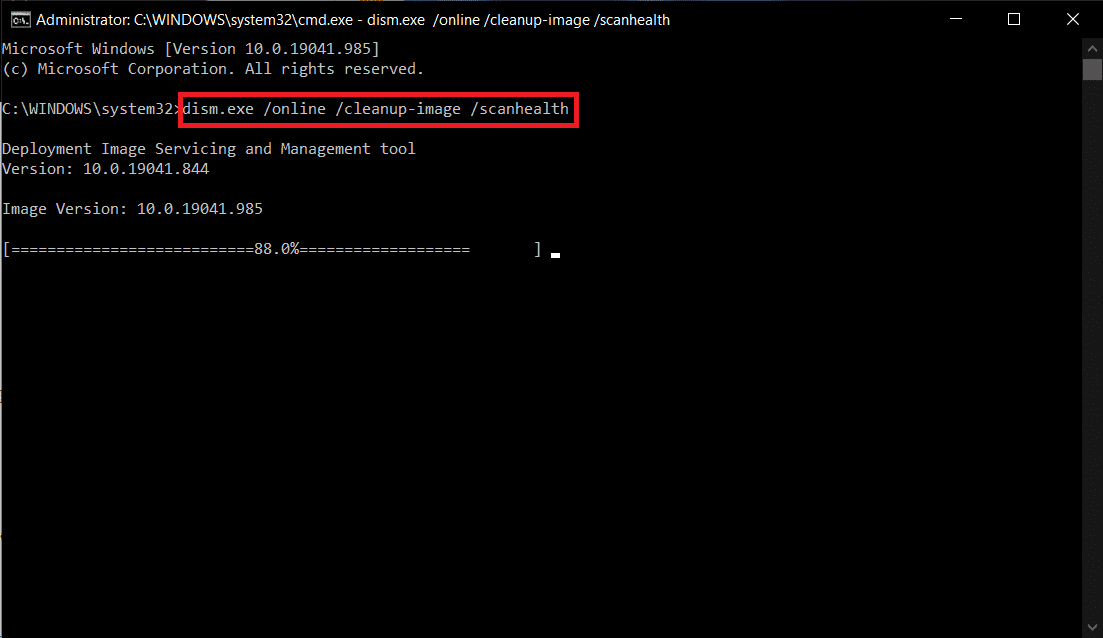
Note: A system scan will be initiated and it will take a couple of minutes to finish. Meanwhile, you can continue performing other activities but be mindful of not accidentally closing the window. 4. Once the scan is finished, restart your PC. Check whether StartupCheckLibrary.dll module is missing error prevails. If yes, then follow these instructions: 5. Again, launch Command Prompt as administrator and execute the given commands one after the other: Note: You must have a working internet connection to execute DISM commands properly.
Also Read: Fix DLL Not Found or Missing on your Windows Computer
Method 3: Delete StartUpCheckLibrary.dll file
It is quite possible that your StartupCheckLibrary.dll has been completely removed from your computer by the antivirus program or by the recent Windows update. Although there might be some scheduled tasks that are unaware of the removal and every time these tasks go off, StartupCheckLibrary.dll module is missing error pops up. You can manually clear traces of .dll file
from Windows Registry Editor and delete the tasks in Task Scheduler or, use Autoruns by Microsoft for this purpose.
Open the Microsoft Autoruns webpage in your preferred web browser.
Click on Download Autoruns and Autorunsc shown highlighted below.
Right-click on the Autoruns file and choose Extract to Autoruns\ option as shown. Note: Depending on your system architecture choose Autoruns or Autoruns64.
Once the extraction process is completed, right-click Autoruns64 folder and choose Run as Administrator from the context menu.
Locate StartupCheckLibrary. Either uncheck the entry or delete it and restart your Windows 10 PC. Note: We have shown MicrosoftEdgeUpdateTaskMachineCore entry as an example below.
Also Read: Fix Windows 10 Update Pending Install
Method 4: Uninstall Windows Updates
If none of the above methods proved successful in getting rid of this annoying error, try reverting to a previous Windows build. If there is an update available, install it first and check if you encounter the same issue. You can also repair Windows 10 to try and fix StartupCheckLibrary.dll missing error. To uninstall a recent Windows update, follow given steps:
Press Windows + I keys simultaneously to open Settings.
Click on the Update & Security tile, as shown.
Go to the Windows Update tab, click on View update history, as depicted.
Next, click on Uninstall updates as shown.
In the following window, click on the Installed On column header to sort updates based on their installation dates.
Right-click the most recent Windows Update patch and select Uninstall as illustrated below.
Follow the on-screen prompts to finish the uninstallation process.
Method 5: Reinstall Windows
We recommend you download the file by reinstalling your Windows altogether. Download the Windows Installation Media Creation Tool. Then, follow the steps listed in our guide on How to do a Clean Install of Windows 10. Note: Be extremely cautious when downloading the file from any random website as it may come bundled with malware and virus. Recommended:
How to Reassign Mouse Buttons on Windows 10 Fix VCRUNTIME140.dll Missing on Windows 11 Fix Windows 10 Volume Control Not Working How to Enable or Disable Compact OS in Windows 11
Let us and other readers know which one of the above solutions helped you fix StartupCheckLibrary.dll missing error. Feel free to reach out to us with your queries and suggestions via comment section below.