Now chkdsk is not an incredibly fast tool and running it might consume a lot of time in some instances. But it performs a very essential task and some of its major functions include scanning and fixing NTFS/FAT drive errors, marking bad sectors in your disk and also fixes corrupt SD card and pen drives. In this post, we will guide you throughout the process of using the chkdsk tool and explain how it works. Don’t worry you don’t have to understand its working in order to know how to and when you need to run it. The process of running the Chkdsk tool is pretty much the same across different Windows version. Though the interface might differ from other Windows versions, we will be showing you how it is run in Windows 10. Recommended Read: Best Classic Shell Alternatives To Get Old Windows Look & Features
How To Use Chkdsk To Repair Hard Disk Errors
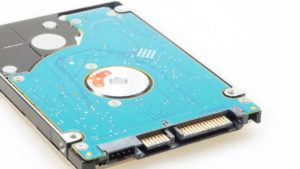
When chkdsk performs a scan on your drive, it scans every sector in the disk and looks for bad sectors. A bad sector is nothing but a small portion of your hard drive that has some defect. There are two types of bad sectors: physical bad sector and logical bad sector. What chkdsk does, is it attempts to resolve the logical bad sector. As it occurs when data is not written properly on the disc. However, chkdsk cannot fix physical bad sectors but detects it so the user can fix the physical damage on its own.
1 How To Use Chkdsk To Repair Hard Disk Errors1.1 Method 1: How To Scan A Disk For Errors Using Check Disk Tool1.2 Method 2: Using Command Prompt1.3 Method 3: From An Installation Disc1.4 Conclusion
Important: Always keep a backup of your important data and files before running chkdsk on your drives. This is because if you have a faulty hard disc, chkdsk can block data from the bad sectors which can result in losing that particular data. Don’t worry if your hard disk is error free, nothing will happen to your data or computer.
Method 1: How To Scan A Disk For Errors Using Check Disk Tool
You can run chkdsk tool on your computer from file explorer to scan any drive. It is a very easy and straightforward method and here’s how you can do it.
- Open the file explorer(This PC) and right-click on the desired drive you wish to scan.
- Navigate to Properties and click on it.
- In the properties window, switch to Tools tab and then select Check button in Error checking section. This button might be named differently on other Windows version.
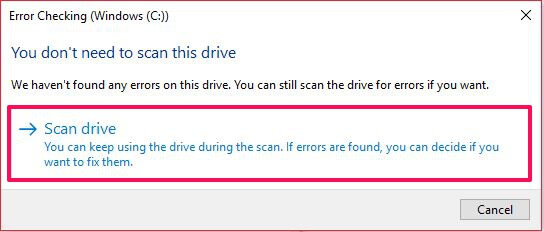
- Once you have done that Windows will inform you that you don’t need to check this drive. This happens because they didn’t find any error in that drive. You can however still manually scan the drive for errors by clicking on Scan drive.
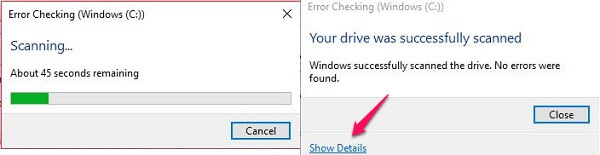
- Let it scan for a minute or so in most cases, otherwise it will take time. The scanning process looks like this. After it is finished you can either close it or click on Show Details to see the detailed information of errors if detected.
Method 2: Using Command Prompt
If you want to run chkdsk command in Command Prompt because your Windows don’t load properly then you can do it by running the Command Prompt with administrative privileges (know how to enable hidden Administrator account in Windows). By this method, you have more control over running a disk check process and external drive scan because it supports other optional choices. Chkdsk command scans your disk in read-only mode that means it will only read the errors in the disc and repair them. But the benefit of running it on Command Prompt is that you don’t have to restart your PC afterward. These are the steps you need to follow in order to run chkdsk in Command Prompt.
- To run the command prompt as administrator press the shortcut keys Windows + X. With this you’ll get the power users menu.
- Then go to Command Prompt(Admin) option or press A to select and run it. Note: In other versions of Windows, you can do this by easily searching for Command Prompt and run it as administrator.
- Now you can start giving chkdsk command in this format: chkdsk [Drive:] [Parameters]. Where Drive represents the name of the desired drive and Parameters represents the different types of repair commands. For example, type “chkdsk C: /f” to start scanning C: drive.
- Hit Enter once you give the command and it will start the repair process and show you the errors associated with that volume. Some of the chkdsk repair commands are as follows:
/f – to fix hard drive errors /r – to locate physical and logical bad sectors /x – to dismount the drive before checking for errors
You can use all the repair commands together if you want and find out more by typing “/?”.
Method 3: From An Installation Disc
This method is usually performed when your Windows won’t start and you can’t get the PC to perform the above two methods. For this, you will need to run the Command Prompt with the use of Windows 10 installation disc. The steps are:
- Insert the Windows 10 Installation Disc and power on your computer.
- After that press any key when you read the message “press any key to boot from CD or DVD”.
- Then perform the basic operations like choosing your keyboard layout, selecting language time and a keyboard method.
- Once you have done this, click Next >Repair your computer
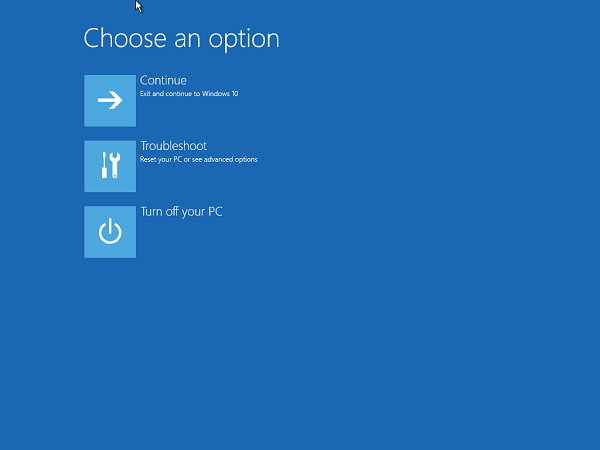
- You will be redirected to choose an option screen. Click on Troubleshoot from the options.
- In troubleshoot screen, click on Advanced options. In advanced options, you will see Command Prompt, click on it and type the command “chkdsk C: /f /x /r” and press Enter to proceed forward. This will now start scanning for any potential errors and faults in your disk.
Conclusion
So these were the 3 methods to make use of chkdsk tool on your Windows PC to fix your hard disk drive related errors. We advise you to run chkdsk every once in a while as a routine method of your disk maintenance. We use it anytime our PC shuts down unexpectedly after a system crash or power loss. Hopefully, it will work for you as well and fix any hard drive errors that you might have. If it doesn’t fix all your errors you can try out other diagnostic tools software, for more detailed diagnosis of your drive. Save my name, email, and website in this browser for the next time I comment. Notify me of follow-up comments via e-mail.
Δ