The Hardware and Devices Troubleshooter is a built-in program used to fix the issues faced by users. It helps you to figure out the problems which might have occurred during the installation of new hardware or drivers on your system. The troubleshooter is automatic and needs to run when an issue related to the hardware is encountered. It runs by checking the common errors which may occur during the installation of the process.
How to Run Hardware and Devices Troubleshooter to Fix Issues
Whenever you run the automated hardware and device troubleshooter, it will identify the issue and then resolve the issue it finds out. But the main question is how to run the Hardware and devices troubleshooter. So, if you are looking for the answer to this question, then follow the guidelines as mentioned.
How to Run Hardware and Devices Troubleshooter to Fix Issues Run Hardware and Devices Troubleshooter on Windows 7 Run Hardware and Devices Troubleshooter on Windows 8 Run Hardware and Devices Troubleshooter on Windows 10
The steps to run hardware and devices troubleshooter on different versions of the Windows operating system are as given under:
Run Hardware and Devices Troubleshooter on Windows 7
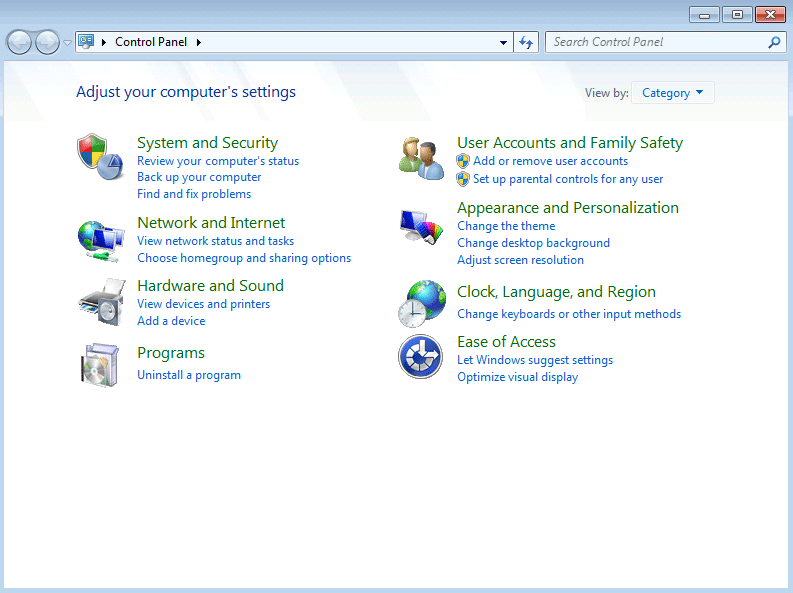
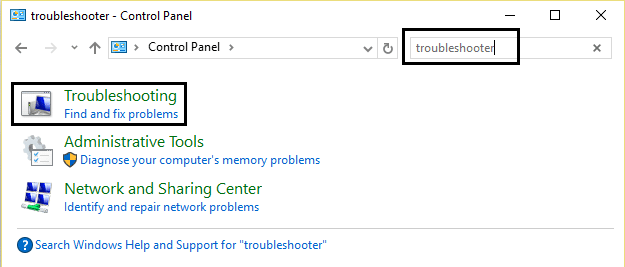
Open Control Panel using the search bar and hit the enter button.
In the search bar on the top right corner, search for the troubleshooter.
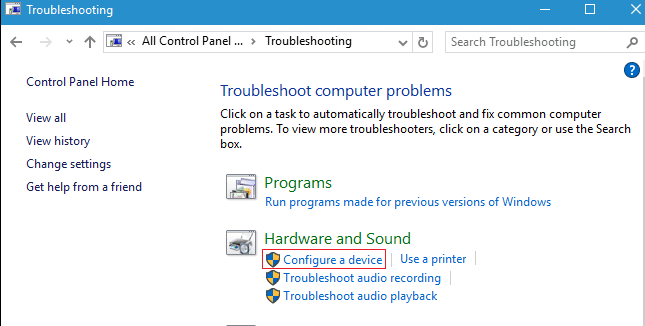
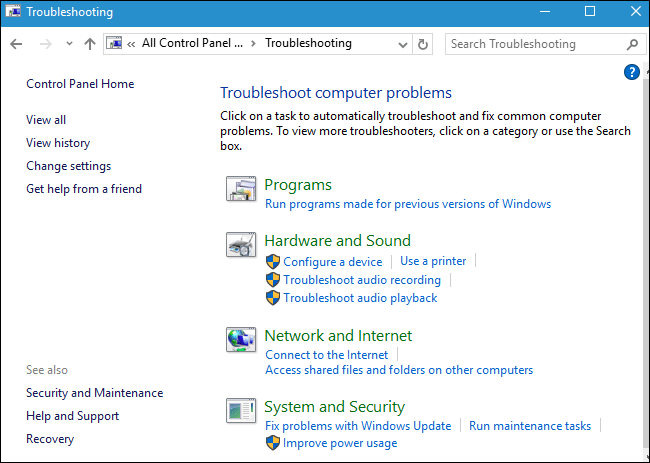
Click on Troubleshooting from the search result. The troubleshooting page will open up.
Click on Hardware and Sound option.
Under Hardware and Sound, click on Configure a device option.
You will be prompted to enter administrator password. Enter the password and click on the confirmation.
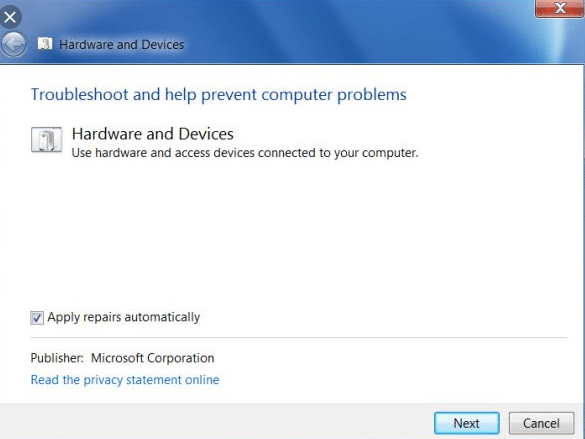
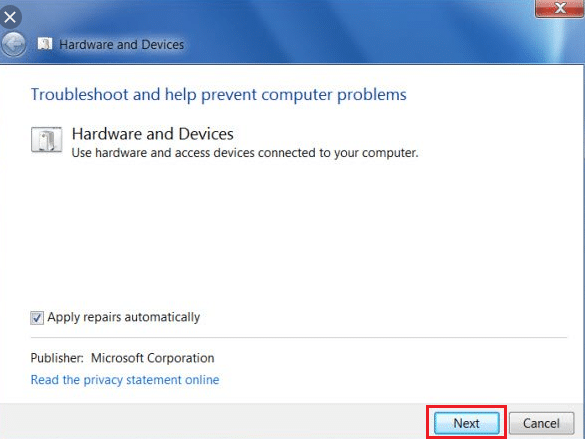
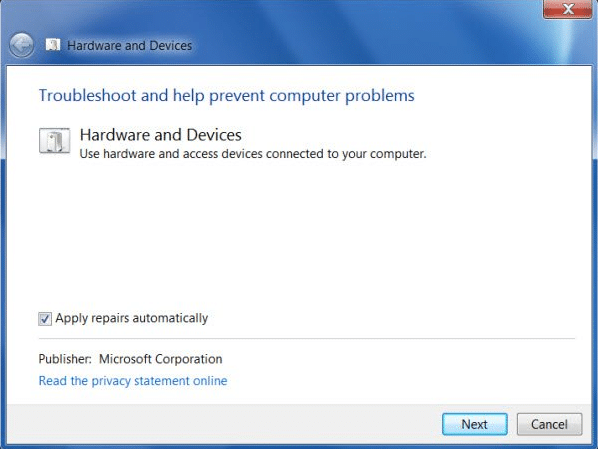
The Hardware and Devices Troubleshooter window will open.
To run the Hardware and Devices troubleshooter, click on the Next button at the bottom of the screen.
The troubleshooter will start detecting issues. If issues are found on your system, then you will be prompted to fix the issues.
The Hardware and Devices Troubleshooter will automatically fix these issues.
If there are no issues, found you can close the Hardware and Devices Troubleshooter. With these steps, the hardware and device troubleshooter will fix all your issues on Windows 7.
Run Hardware and Devices Troubleshooter on Windows 8
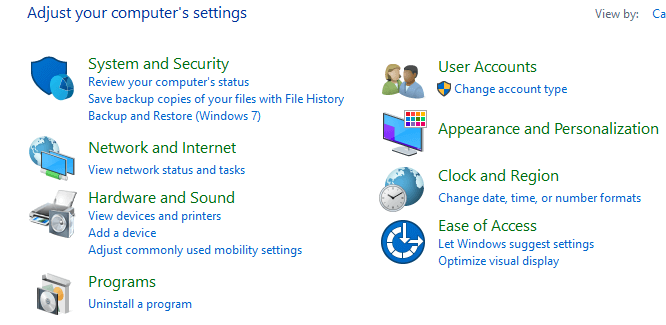
Open Control Panel by using the search bar and hit the enter button. Control Panel will open up.
Type troubleshooter in the search bar on the top right corner of the Control Panel screen.
Hit the enter button when troubleshooting appears as the search result. The troubleshooting page will open.
Click on Hardware and Sound option.
Under Hardware and Sound, click on Configure a device option.
You will be prompted to enter the administrator password. Enter the password and then click on the confirmation button.
The Hardware and Devices Troubleshooter window will open.
Click on the Next button to run the Hardware and Devices troubleshooter.
The troubleshooter will start detecting issues. If issues are found on your system, then you will be prompted to fix the issues.
The Hardware and Devices Troubleshooter will automatically fix these issues.
If there are no issues, found you can close the Hardware and Devices Troubleshooter. Also Read: Troubleshoot Internet Connection Problems in Windows 10
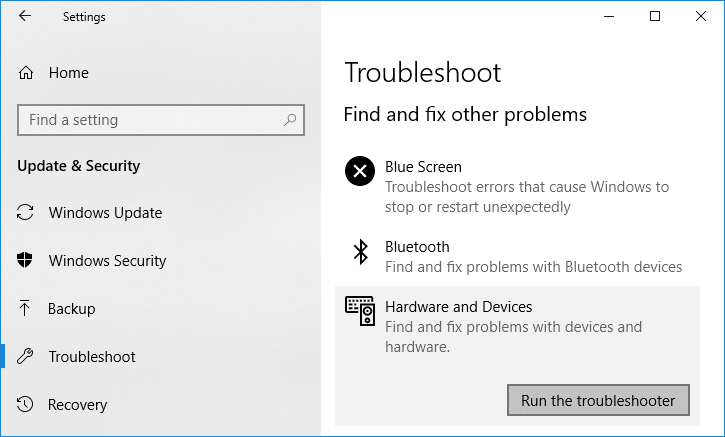
Run Hardware and Devices Troubleshooter on Windows 10
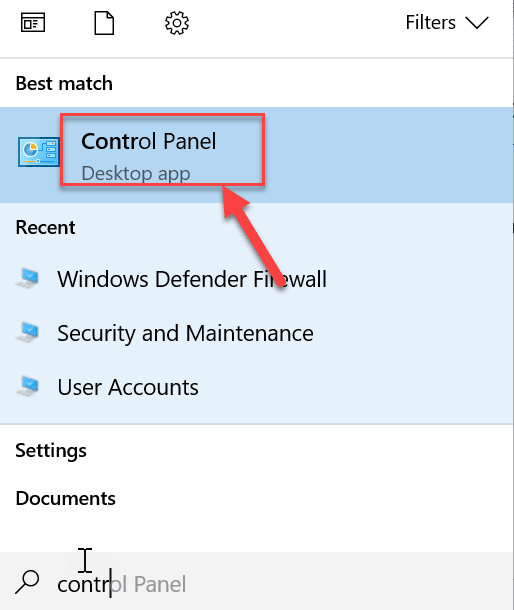
Open Control Panel using the Windows search bar.
Select Control Panel from the search list. The Control Panel window will open up.
Search for troubleshooter using the search bar on the top right corner of the Control Panel screen.
Click on Troubleshooting from the search result.
The troubleshooting window will open up.
Click on Hardware and Sound option.
Under Hardware and Sound, click on Configure a device option.
You will be prompted to enter the administrator password. Enter the password and then click on the confirmation.
The Hardware and Devices Troubleshooter window will open up.
Click on the Next button that will be on the bottom of the screen to run the Hardware and Devices troubleshooter.
The troubleshooter will start detecting issues. If issues are found on your system, then you will be prompted to fix the issues.
The Hardware and Devices Troubleshooter will automatically fix these issues.
If there are no issues, found you can close the Hardware and Devices Troubleshooter. With these steps, the hardware and device troubleshooter will fix all the issues on your Windows 10 device. Recommended:
Fix Computer Sound Too Low on Windows 10 How to Install or Uninstall OneDrive in Windows 10
So, by using the mentioned steps, hopefully, you will be able to run Hardware and Devices Troubleshooter to fix issues on Windows 7, Windows 8, and Windows 10.